Autonomous vehicle: The Chassis
I am a big fan of the concept of autonomous vehicles. I decided to create a small prototype. I have almost no experience in doing such things like programming the sensors, motors, robots. Still, I want to try to build something smart and autonomous.
Before creating a smart vehicle, it was evident that we need at least something that we can drive and program.
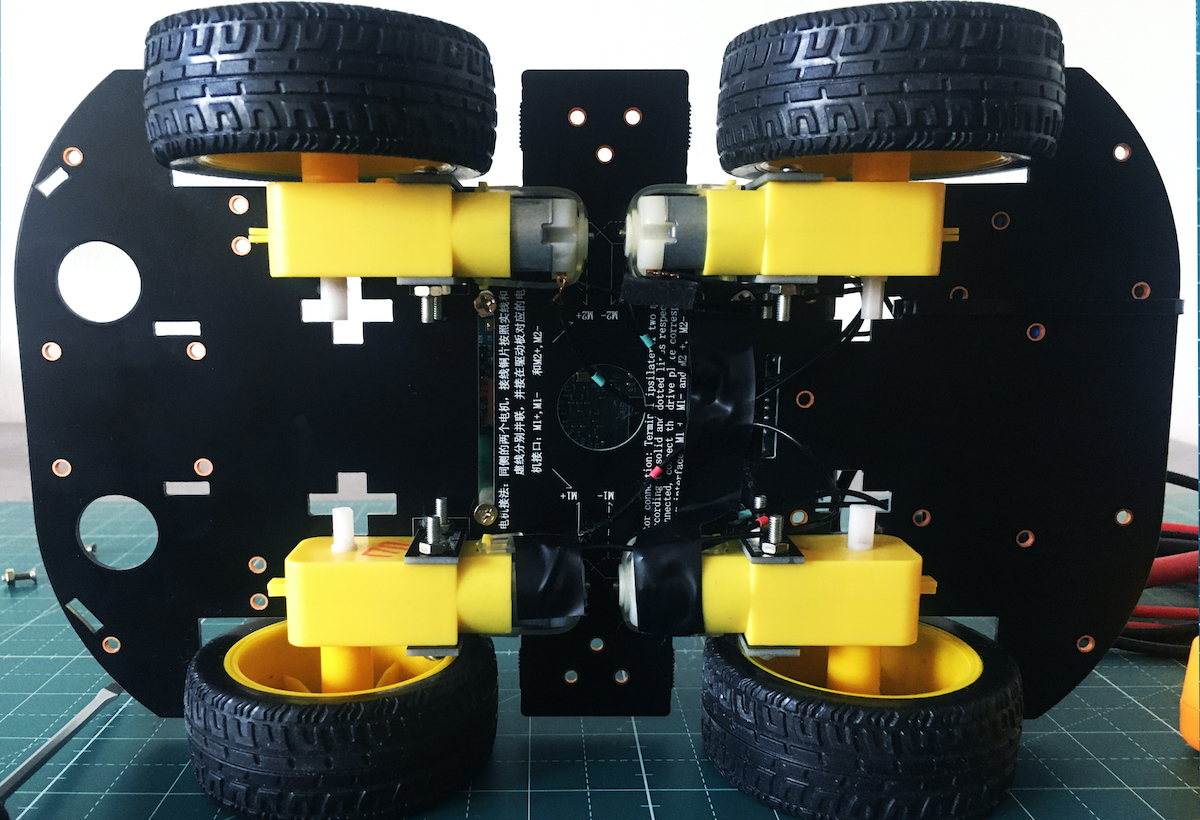
As a base, I decided to use one of the no-name chassis, similar you can easily find on the Internet. Here is a photo:

Looking closer, we see that it has:
- 4 Wheels
- 1 Battery
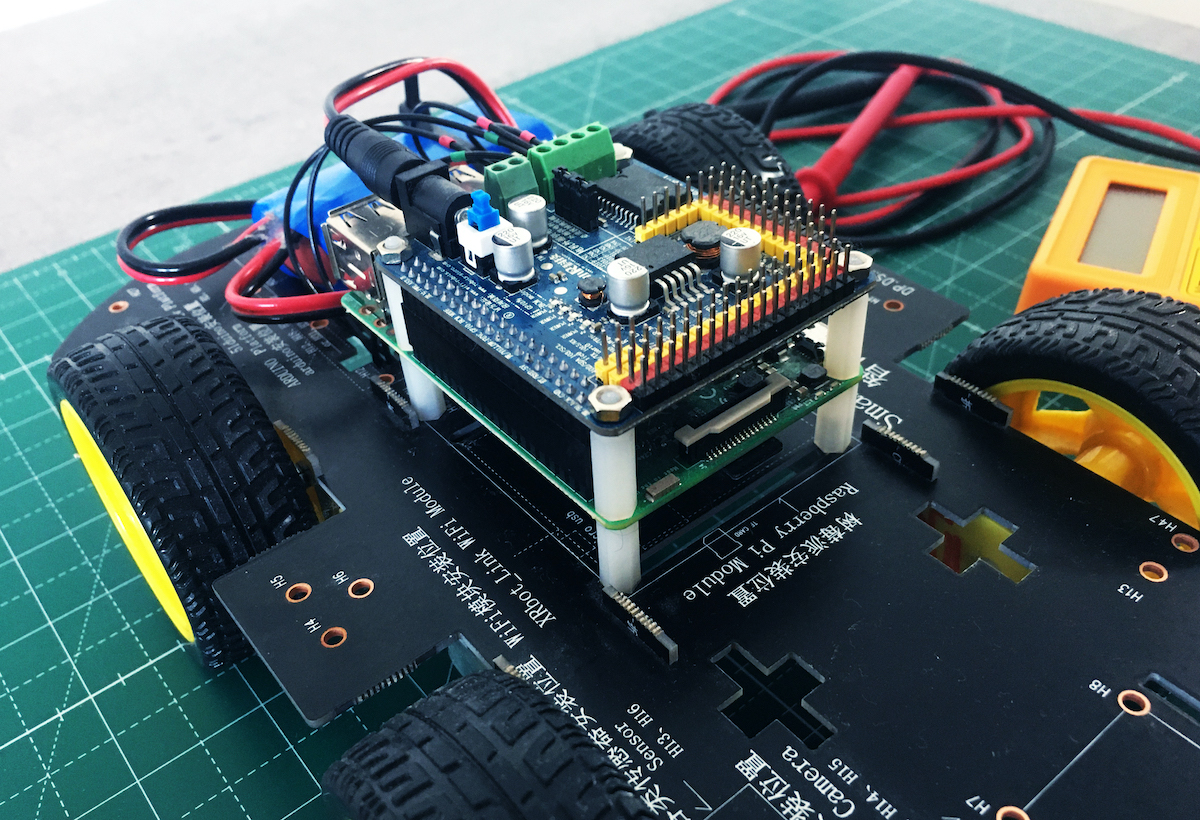
- Raspberry Pi 3
- PWR.A53.A Power and Motor Driver Board
- 4 DC motors
I got it already assembled. It simplified a task for me. Also, it has a preinstalled Raspbian, so I was able to run the OS on Raspberry Pi 3 and log in.
After connecting to the wifi, the first things I did were enabling ssh and i2c options in Raspbian config. You can do it with sudo raspi-config or via a graphical interface.
After doing it, it is already possible to access Raspberry Pi remotely via ssh from the computer within the same network.
Knowing that many people are using the python programming language to program Raspberry Pi, I also decided to use it. In this project, I used python3.
Goal
The goal of this article is to show how you can program the RC car using the Raspberry Pi and any compatible chassis.
Before the start
- Don’t forget you are working with electricity. It is required to observe regulations for ensuring the safety and protection of health.
- While doing initial tests, unmount the wheels from the vehicle, sometimes it tries to run away.
Virtual env
This step is not necessary, but to not pollute the system with dependencies, I created a virtual env on Raspberry Pi. To create a virtual env called robo, run the following commands :
pip3 install virtualenv
/home/pi/.local/bin/virtualenv robo
Every time you want to use your virtual env, run :
source robo/bin/activate
Dependencies
Code from the examples requires the following dependencies:
RPi.GPIOto work with gpio (read more about gpio here)getchto read the user input from std input
Both you can install via pip:
pip3 install getch and pip3 install RPi.GPIO accordingly.
Find a proper GPIOs
By looking at the top board of the chassis, it was unclear, to which GPIOs motors are connected. By searching in google for PWR.A53.A pin map, I found the following picture:
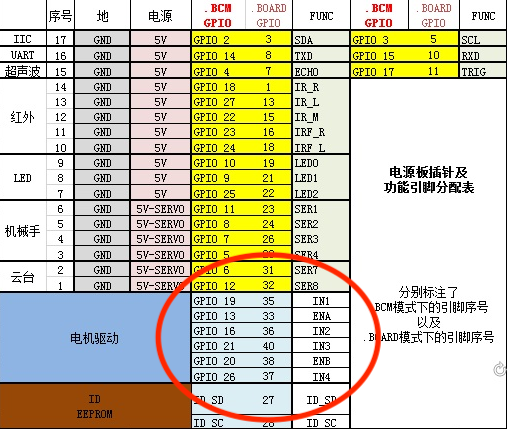
Here it is saying that for the mode BCM mapping is:
# motor 1 is driving right wheels
# motor 2 is driving left wheels

ENA = 13 // on/off of motor 1
ENB = 20 // on/off of motor 2
IN1 = 19 // in my wiring: motor 1 - backward
IN2 = 16 // -*- : motor 1 - forward
IN3 = 21 // -*- : motor 2 - backward
IN4 = 26 // -*- : motor 2 - forward
This information is sufficient to start to program the vehicle.
Code
Create a file main1.py in you Raspberry Pi with the following content (link to github):
import RPi.GPIO as GPIO
import getch

print("start")

# Change the mode to the BCM, to use known GPIO's mapping
GPIO.setmode(GPIO.BCM)

# Define a constants to have a reasonable names for the GPIOs
ENA = 13
ENB = 20
IN1 = 19
IN2 = 16
IN3 = 21
IN4 = 26

# Set the initial state for the GPIOs: mode OUT, value LOW
GPIO.setup(ENA, GPIO.OUT, initial=GPIO.LOW)
GPIO.setup(ENB, GPIO.OUT, initial=GPIO.LOW)
GPIO.setup(IN1, GPIO.OUT, initial=GPIO.LOW)
GPIO.setup(IN2, GPIO.OUT, initial=GPIO.LOW)
GPIO.setup(IN3, GPIO.OUT, initial=GPIO.LOW)
GPIO.setup(IN4, GPIO.OUT, initial=GPIO.LOW)

# Turn on the motors, by setting signal to HIGH
GPIO.output(ENA, True)
GPIO.output(ENB, True)


# Rotate motors forward
def forward():
    GPIO.output(IN1, False)
    GPIO.output(IN2, True)
    GPIO.output(IN3, False)
    GPIO.output(IN4, True)


# Rotate motors backward
def backward():
    GPIO.output(IN1, True)
    GPIO.output(IN2, False)
    GPIO.output(IN3, True)
    GPIO.output(IN4, False)


# Right motor forward, left backward
def left():
    GPIO.output(IN1, False)
    GPIO.output(IN2, True)
    GPIO.output(IN3, True)
    GPIO.output(IN4, False)


# Left motor forward, right backward
def right():
    GPIO.output(IN1, True)
    GPIO.output(IN2, False)
    GPIO.output(IN3, False)
    GPIO.output(IN4, True)


# Set all GPIOs to low, to stop the vehicle
def stop():
    GPIO.output(IN1, False)
    GPIO.output(IN2, False)
    GPIO.output(IN3, False)
    GPIO.output(IN4, False)


# Implement vehicle control
def switch(x):
    return {
        'w': lambda: forward(),
        's': lambda: backward(),
        'a': lambda: left(),
        'd': lambda: right(),
        'h': lambda: stop(),
    }[x]


# Main loop
while True:
    # Read char from input
    char = getch.getch()
    try:
        # Try to find and run proper control
        switch(char)()
    except KeyError:
        # If unknown control was requested, stop the loop
        break

# Reset all GPIOs configured by this command
GPIO.cleanup()

print("end")
Run
To start controlling the vehicle:
- connect to it via
ssh, if you haven’t already - ensure you activated necessary virtual env, in my case it is
robo - run
python main1.py - use
w,s,a,dto drive around,hto stop, any other char to exit.
Conclusion
Ideas from above could help you to build the base for your AV project. It is not yet really autonomous, but the first step towards the goal. Using this base, you can build more advanced systems, add sensors and controls.